

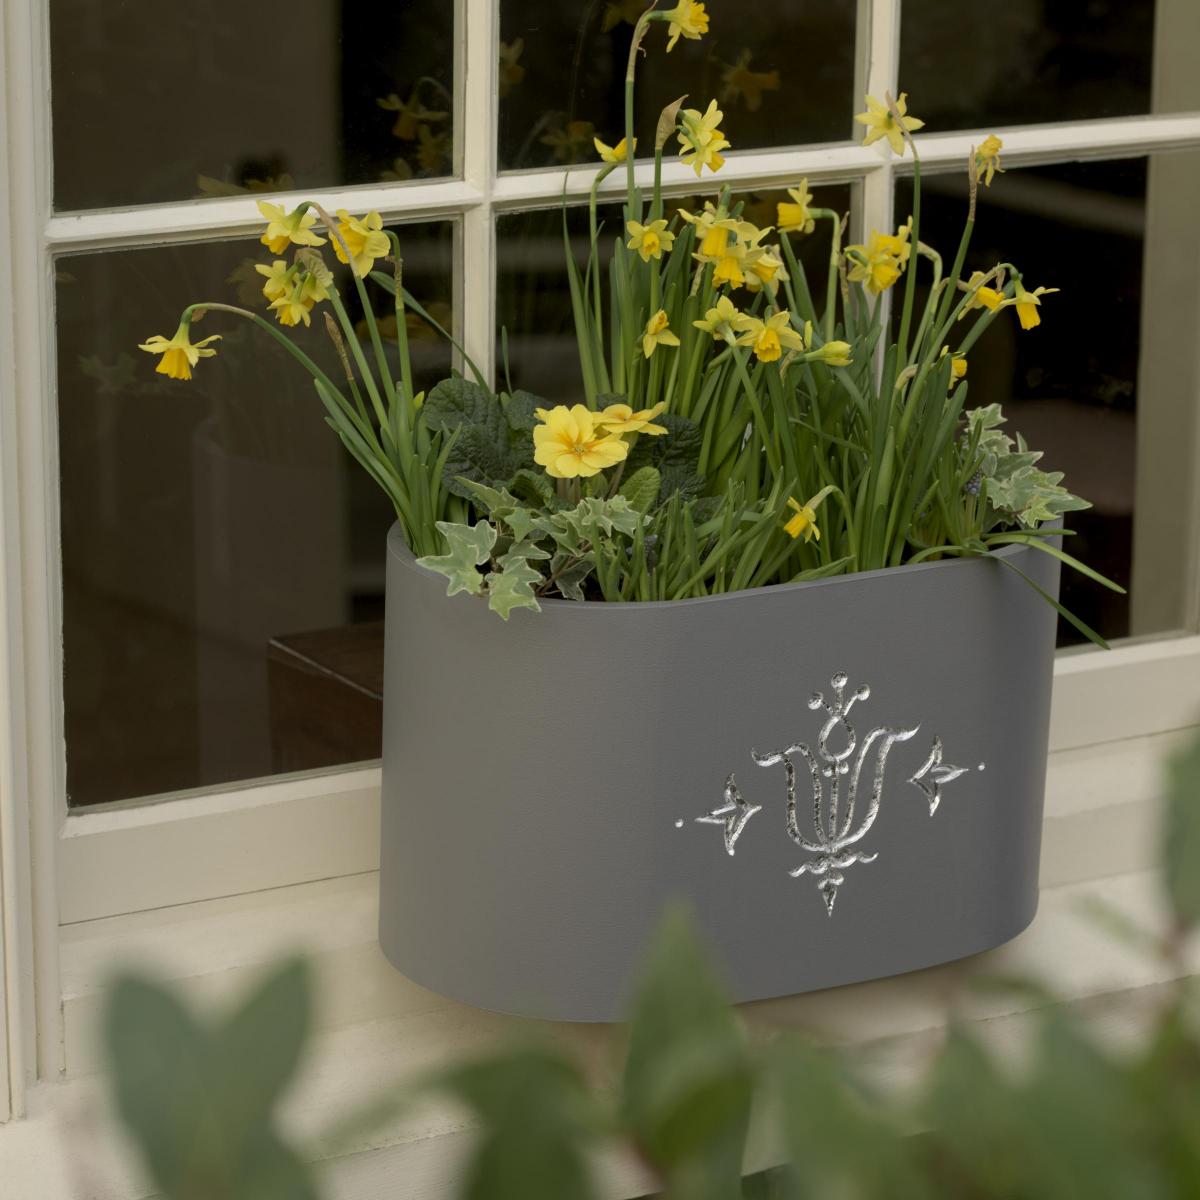


Make your balcony, window ledge, terrace or patio the place where your home greets the return of the sun with a gorgeous Springtime flower-filled windowbox. Simply buy the items listed below to carve and decorate your Spring windowbox and follow our instruction, courtesy of toolmaker Dremel:
Materials required :
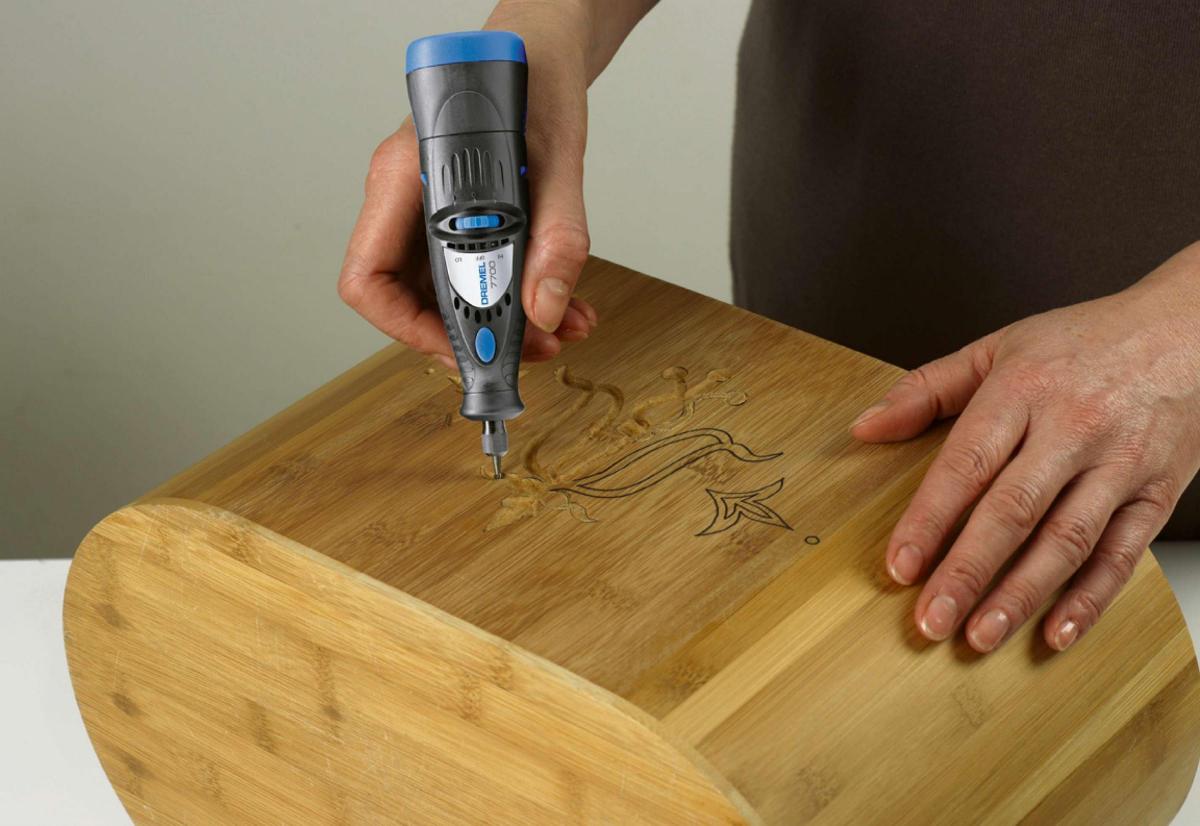
Dremel 7700 Hobby
Dremel engraving cutter 111, tungsten carbide cutter 9905
Dremel sanding bands 432 or SpeedClic abrasive brushes 511, 512
Dremel multi-chuck 4486
Wooden window box
Exterior paint
Gold ‘size’ and silver metal leaf
Exterior varnish
Step One
Mark out your design onto a piece of paper and then trace this onto the centre of one of the side panels of the window box in pen. Then, take your Dremel 7700 and attach the multi-chuck and the Dremel engraving cutter 111 to carve the outline of your design into the wood.
Step Two
Then, remove the Engraving Cutter and attach the Dremel tungsten carbide cutter 9905 to gauge out and remove the wood from within the lines of your design.
Step Three
Once this is done, remove the Tungsten Carbide Cutter and insert the Dremel fine grit sanding band 432 and smooth down any rough edges to your design. For detailed smooth sanding, where you need to be careful of the delicate nature of your project, use the SpeedClic Mandrel and Abrasive Brushes 511 or 512. These adjust to the outlines of your design and are useful where the sanding bands may be a little too aggressive or the design is too delicate for the sanding bands to be able to get into all the nooks and crannies.
Step Four
Using a suitable roller, paint the planter and allow it to dry thoroughly. Following the manufacturers instructions, apply gold ‘size’ to the carved motif, then gild the carved area with silver metal leaf to create an elegant look worthy of any season.
Finally, protect your planter with a couple of coats of exterior varnish.


Comments: Our rules
We want our comments to be a lively and valuable part of our community - a place where readers can debate and engage with the most important local issues. The ability to comment on our stories is a privilege, not a right, however, and that privilege may be withdrawn if it is abused or misused.
Please report any comments that break our rules.
Read the rules here