
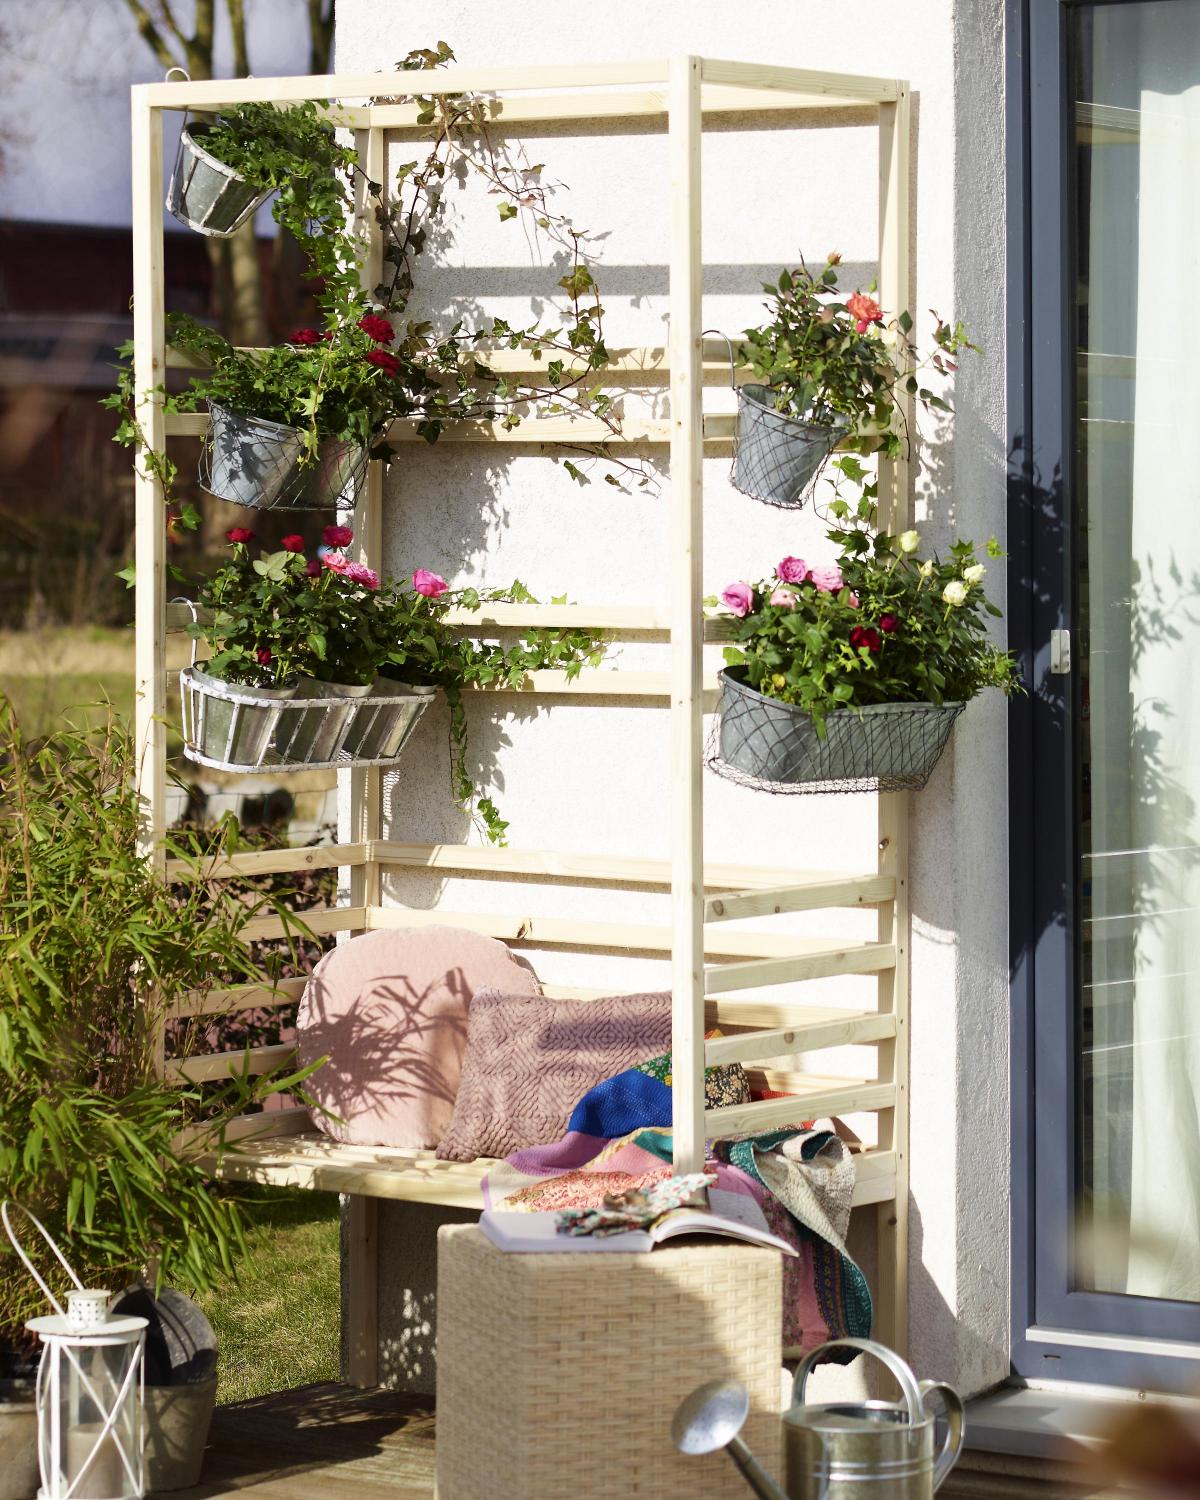
It's the perfect spot for listening to the birds or counting stars at night. Create an attractive garden seat with our step-by-step guide, courtesy of Dremel.
Your materials at a glance
• Dremel 8100
• Drill bit set 628
• Dremel DSM20
• Multipurpose carbide cutting wheel DSM500
From the hardware store:
• 19 wooden battens (2 m x 3.4 cm x 3.4 cm)
• Wood glue
• Wood screws (4 x 50 mm)
• Screwdriver
• Filler and putty knife
• Sandpaper, 120 grain
• Paintbrush, weatherproof varnish
• 6-8 hanging flower pots, plants
Difficulty rating
4 stars
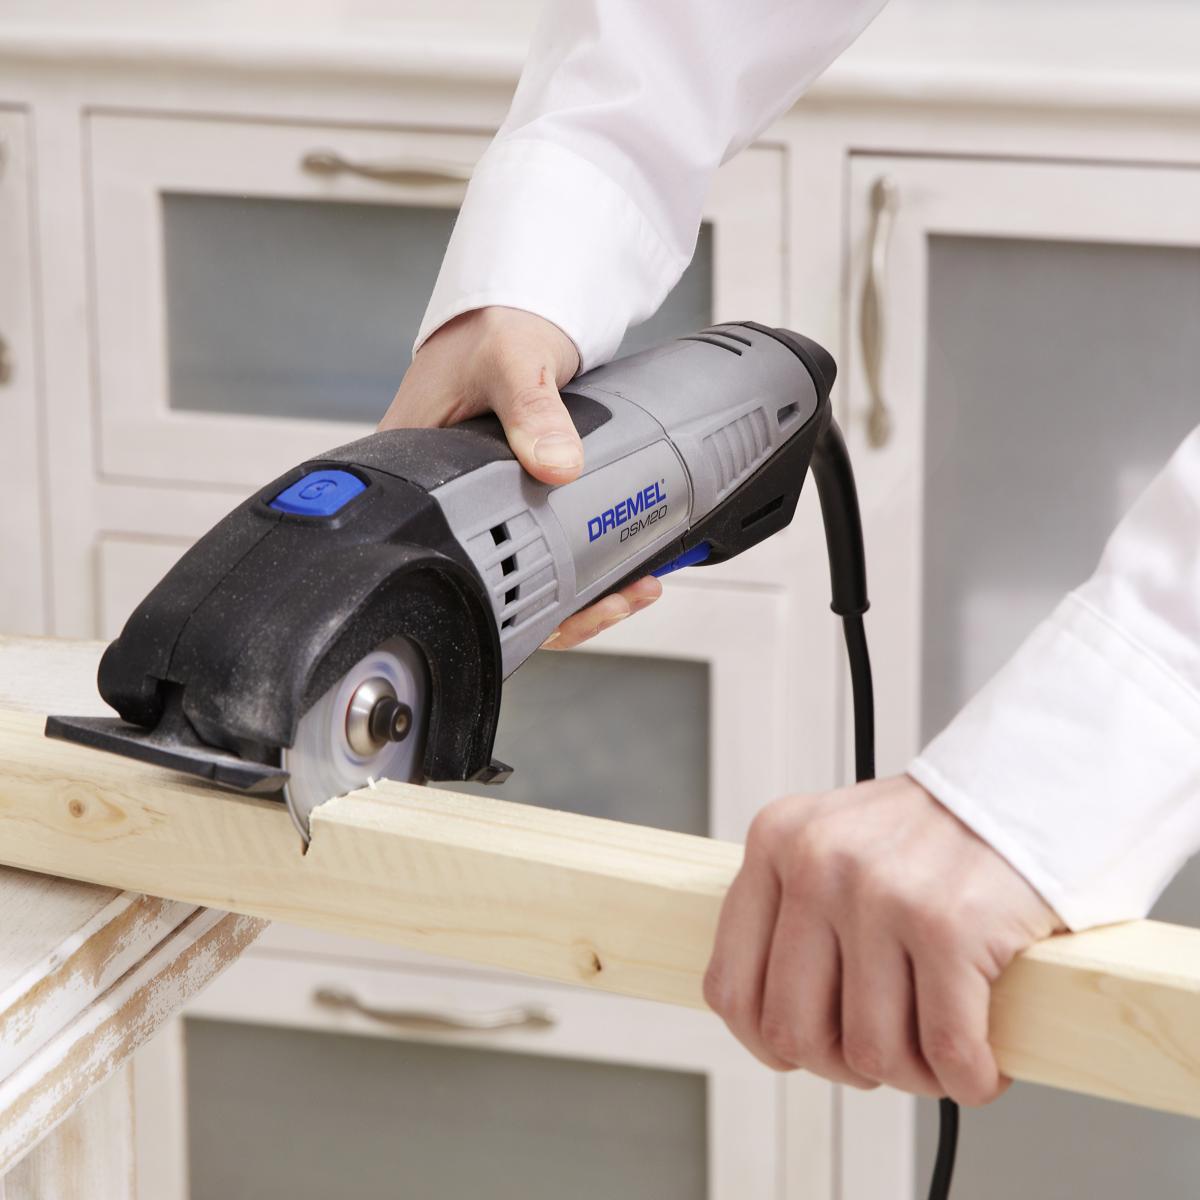
Step 1:
First, cut the wooden battens for the frame to size, using a Dremel DSM20 with a multipurpose carbide cutting wheel. You need to saw 22 pieces 48 cm in length and 18 pieces 98 cm in length. Then use sandpaper to remove loose wood fibres along the cut edges.
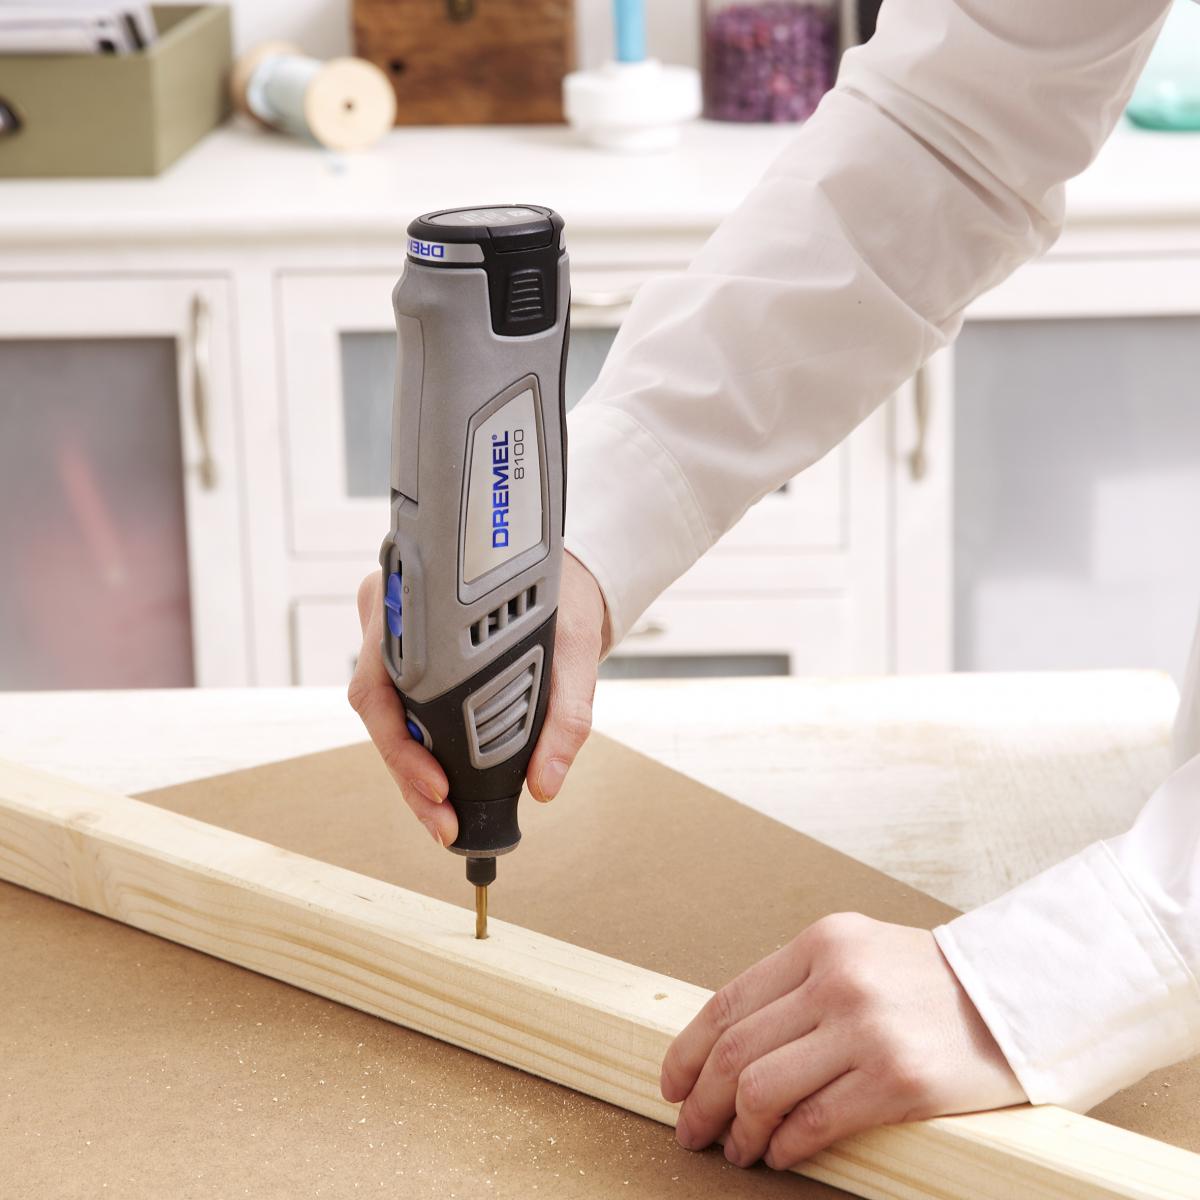
Step 2:
Refer to the assembly plan, on which the holes to be drilled are marked by red dots. Mark the drill holes on to the wood by means of a pencil. To pre-drill the holes, insert the drill bit onto the Dremel 8100.
Step 3:
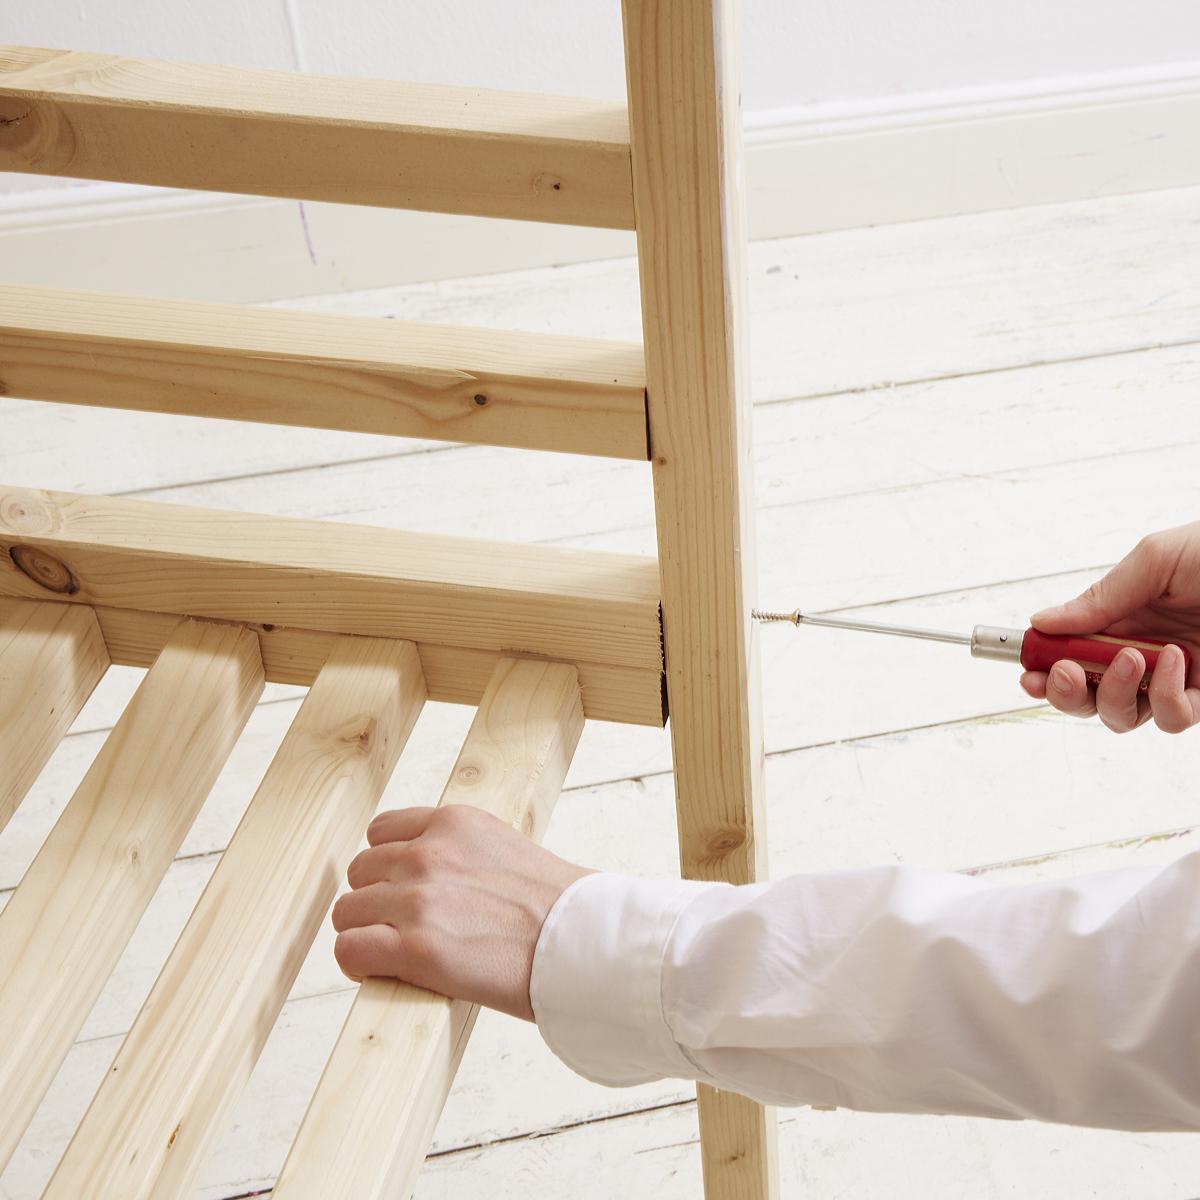
Now start screwing. Keeping the plan where you can see it, screw the individual pieces together with 4 mm x 50 mm wood screws. To strengthen the join, paint the cut edges with glue.
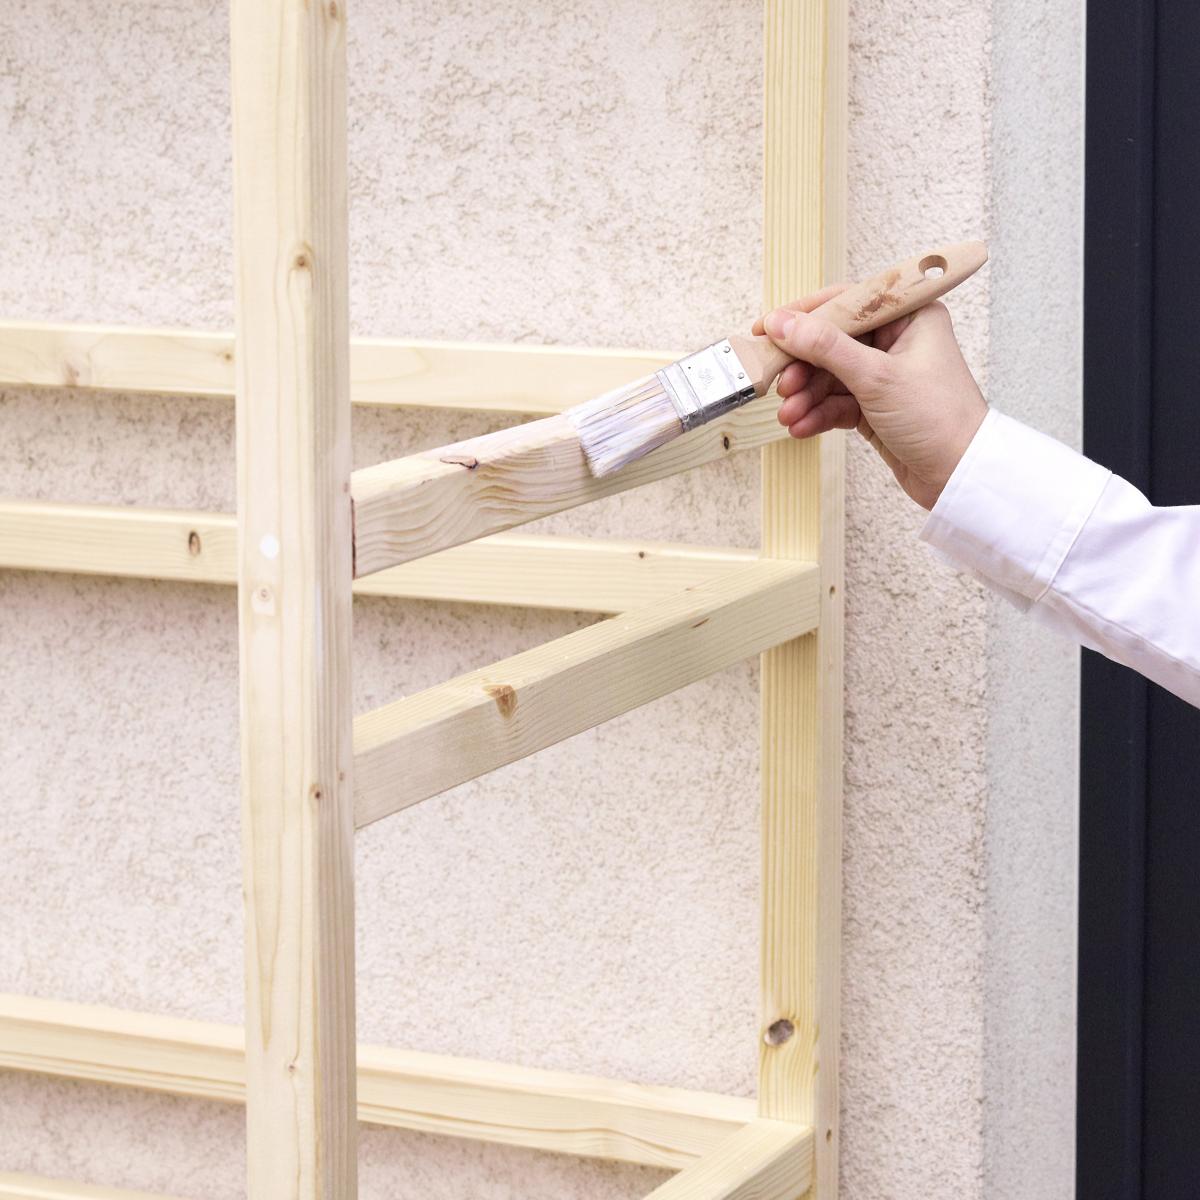
Step 4:
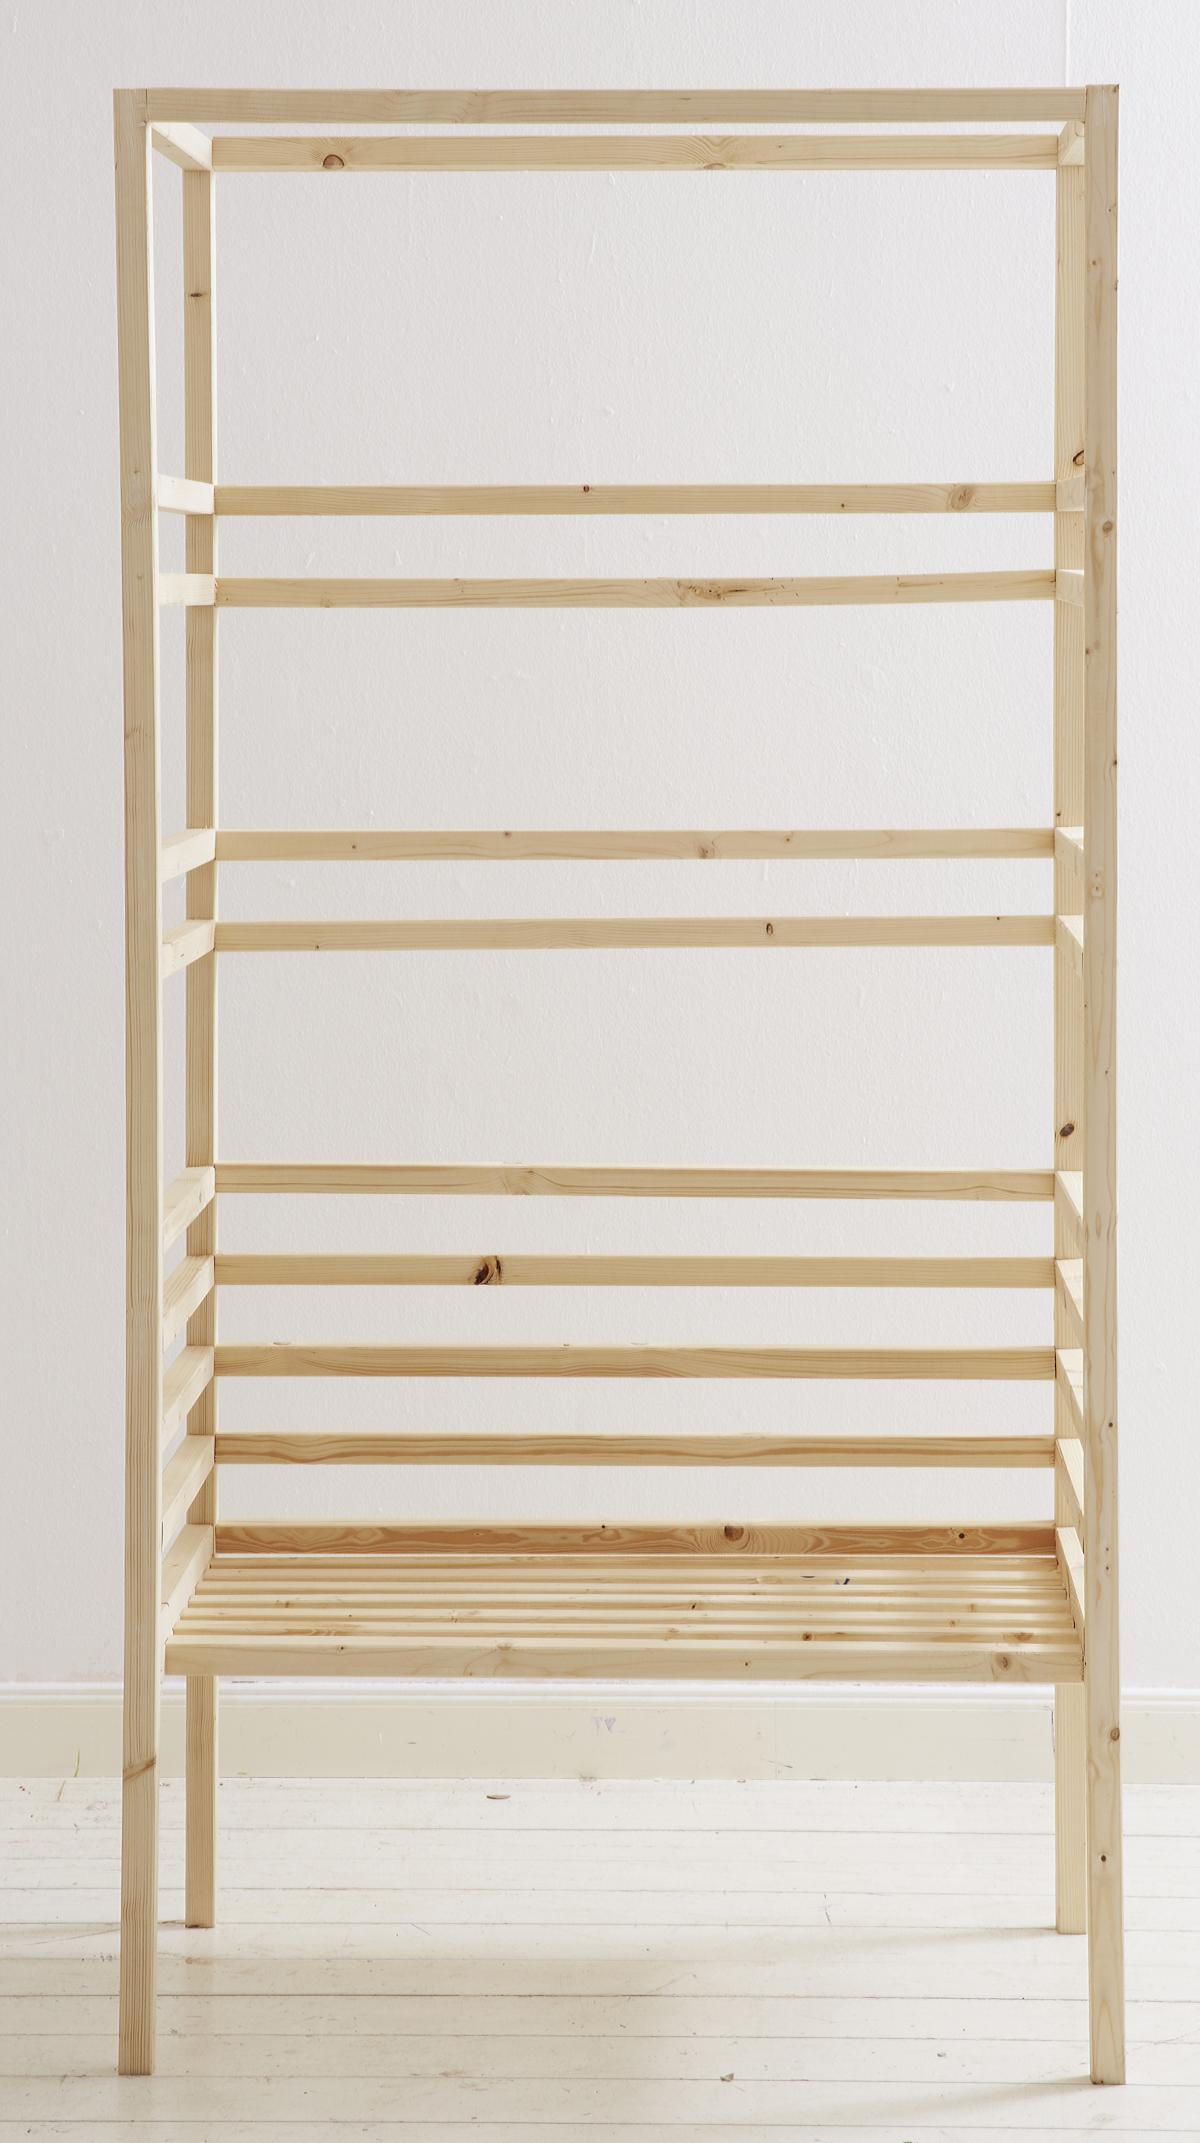
Once your basic frame is ready, you can start on the final touches. For example, an elegant way to conceal visible screws is with filler. To make the garden seat resistant to wind and weather, you can paint the wooden parts with a weatherproof varnish and leave them to dry.
Step 5:
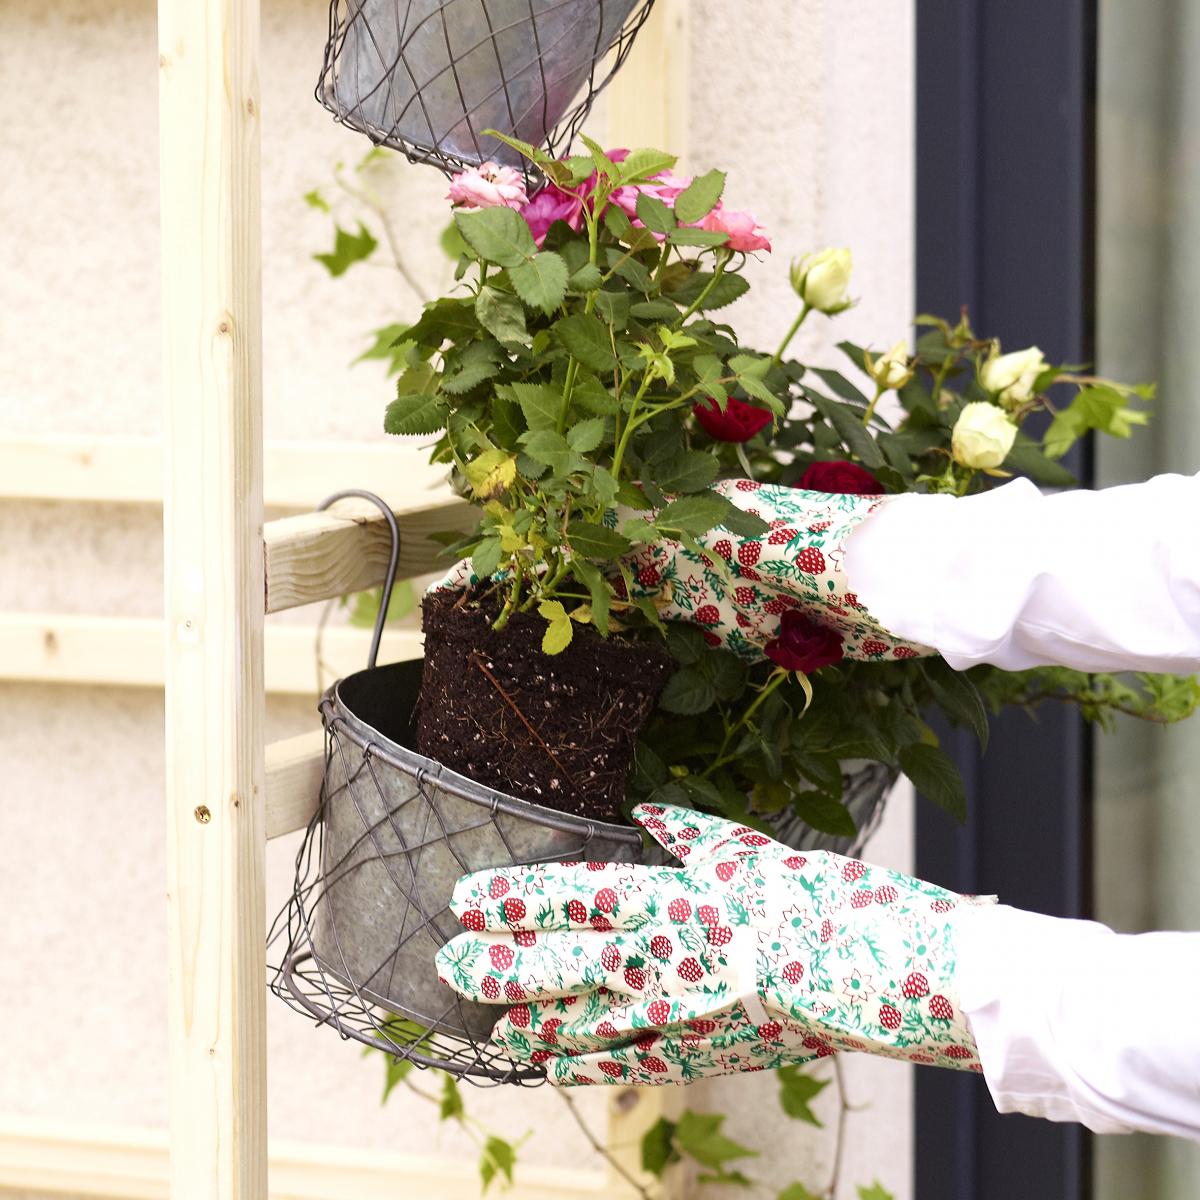
Finally, decorate the garden seat with hanging flower pots and plant them up with you favourite flowers. Roses of different colours are especially attractive. A tip for cooking enthusiasts – Mediterranean herbs such as rosemary are sun worshippers, exude a wonderful aroma and are aromatic kitchen aids.


Comments: Our rules
We want our comments to be a lively and valuable part of our community - a place where readers can debate and engage with the most important local issues. The ability to comment on our stories is a privilege, not a right, however, and that privilege may be withdrawn if it is abused or misused.
Please report any comments that break our rules.
Read the rules hereLast Updated:
Report this comment Cancel