

ALL wooden windows and sills rot if they are not continually repaired. It’s only when the damage has been done that most people notice it. Here's our step-by-step guide, couresy of toolmaker Dremel, to show you how:
Materials required :
Dremel Multi-Max
Dremel Multi-Max Wood and Metal Flush Cut Blade MM422
Dremel Multi-Max Wood and Drywall Saw Blade MM450
Dremel Multi-Max Hook and Loop Sanding Pad MM11
Dremel Multi-Max Sanding Paper for Wood MM70W P240
Dremel Glue Gun 910 and 7mm wood glue stick
Marker pen or pencil and ruler
Hardwood
Wood glue
Primer, undercoat and gloss paint
Difficulty rating :
Two stars – fairly easy
Step One
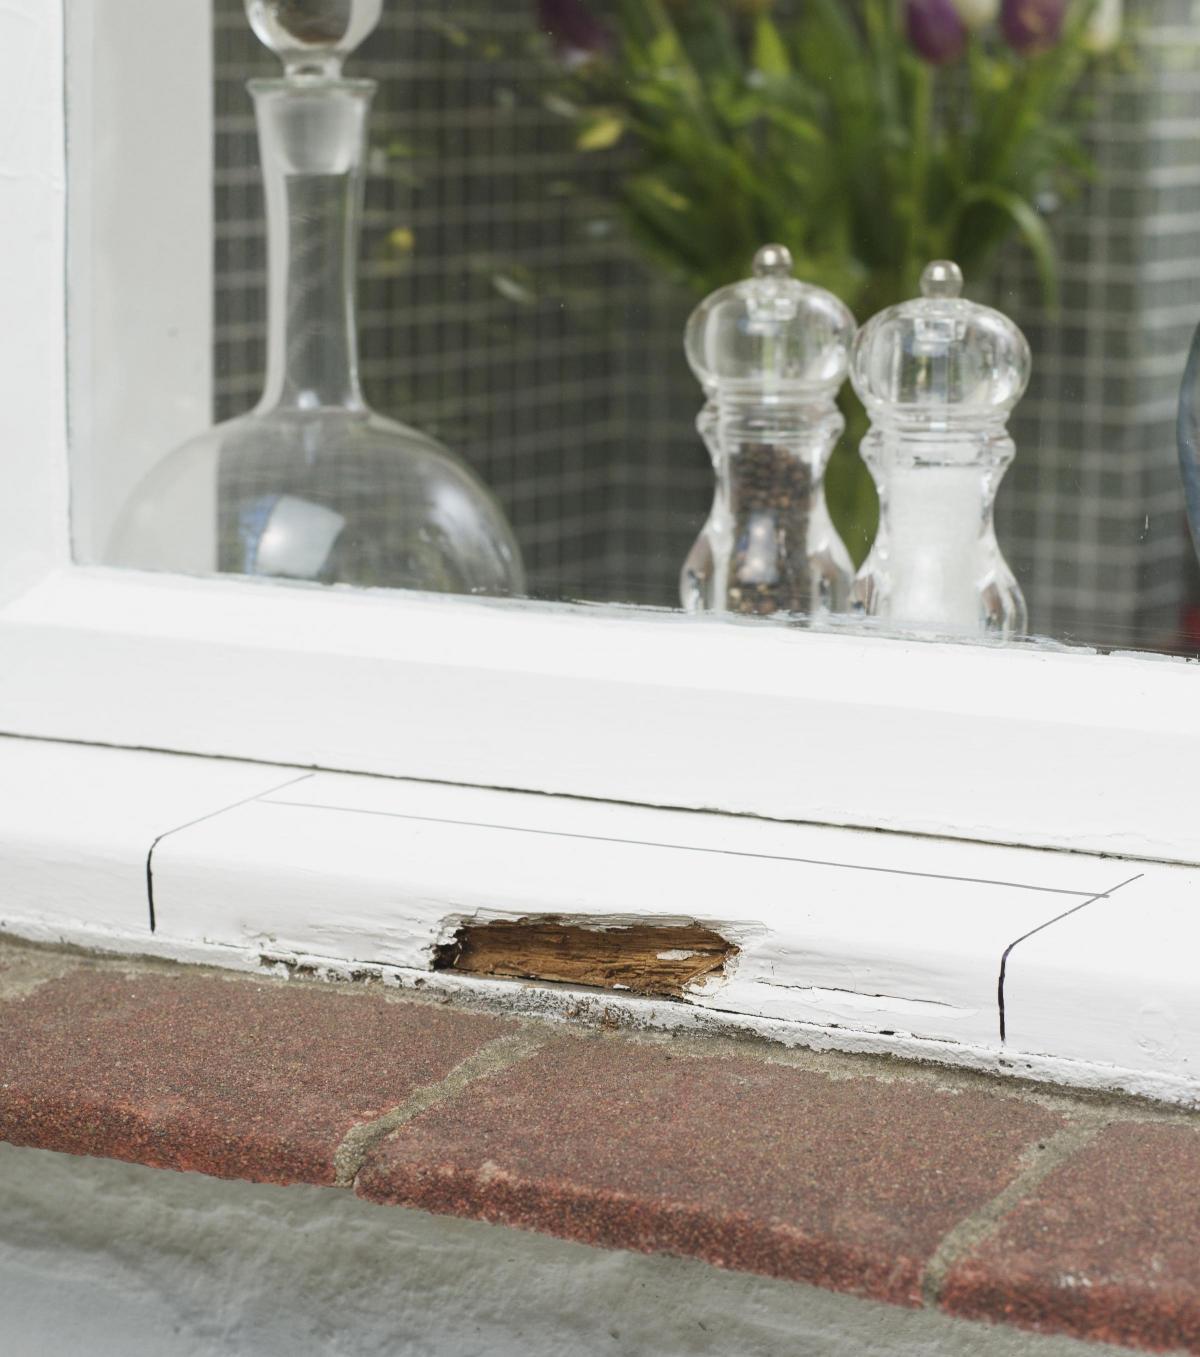
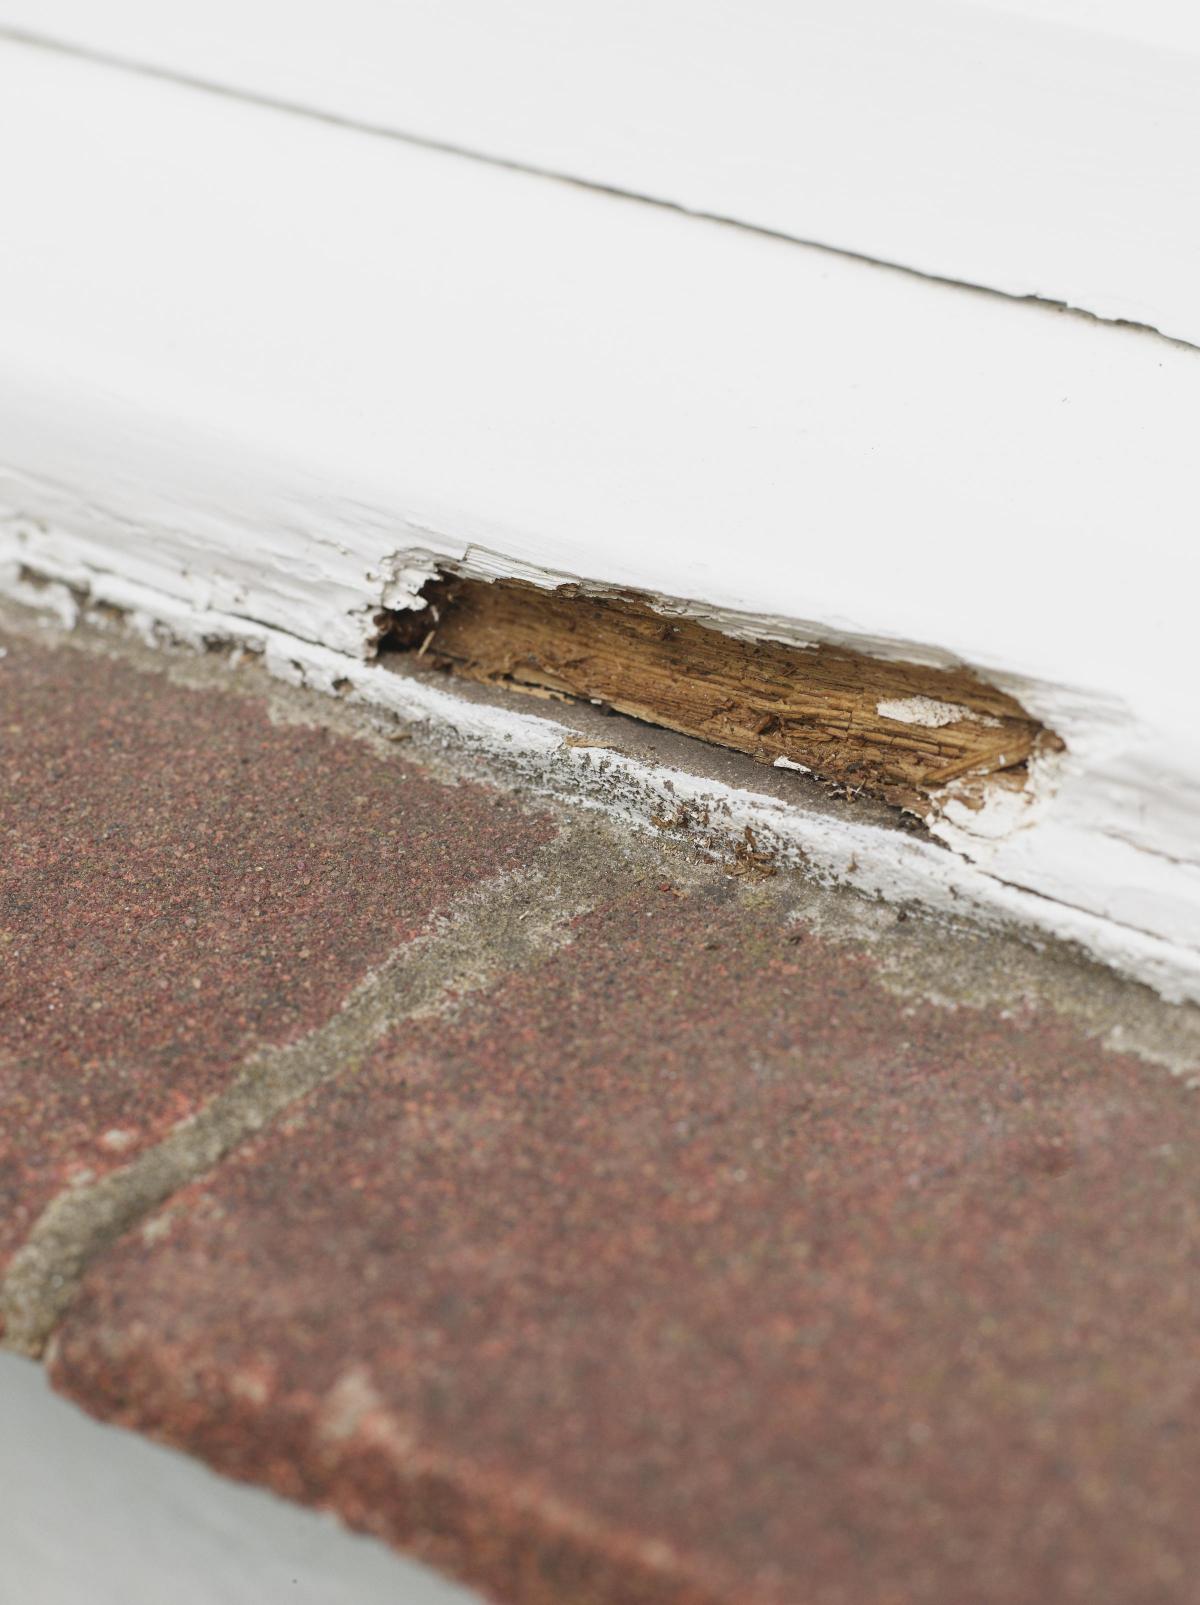
First, press your finger into the wood on your windowsill and check which areas feel soft and are therefore, rotten. Then, make sure that the area you are going to cut out is slightly larger than the soft areas so that you are sure to remove all the rot and mark it up using a marker pen or pencil and ruler.
Step Two
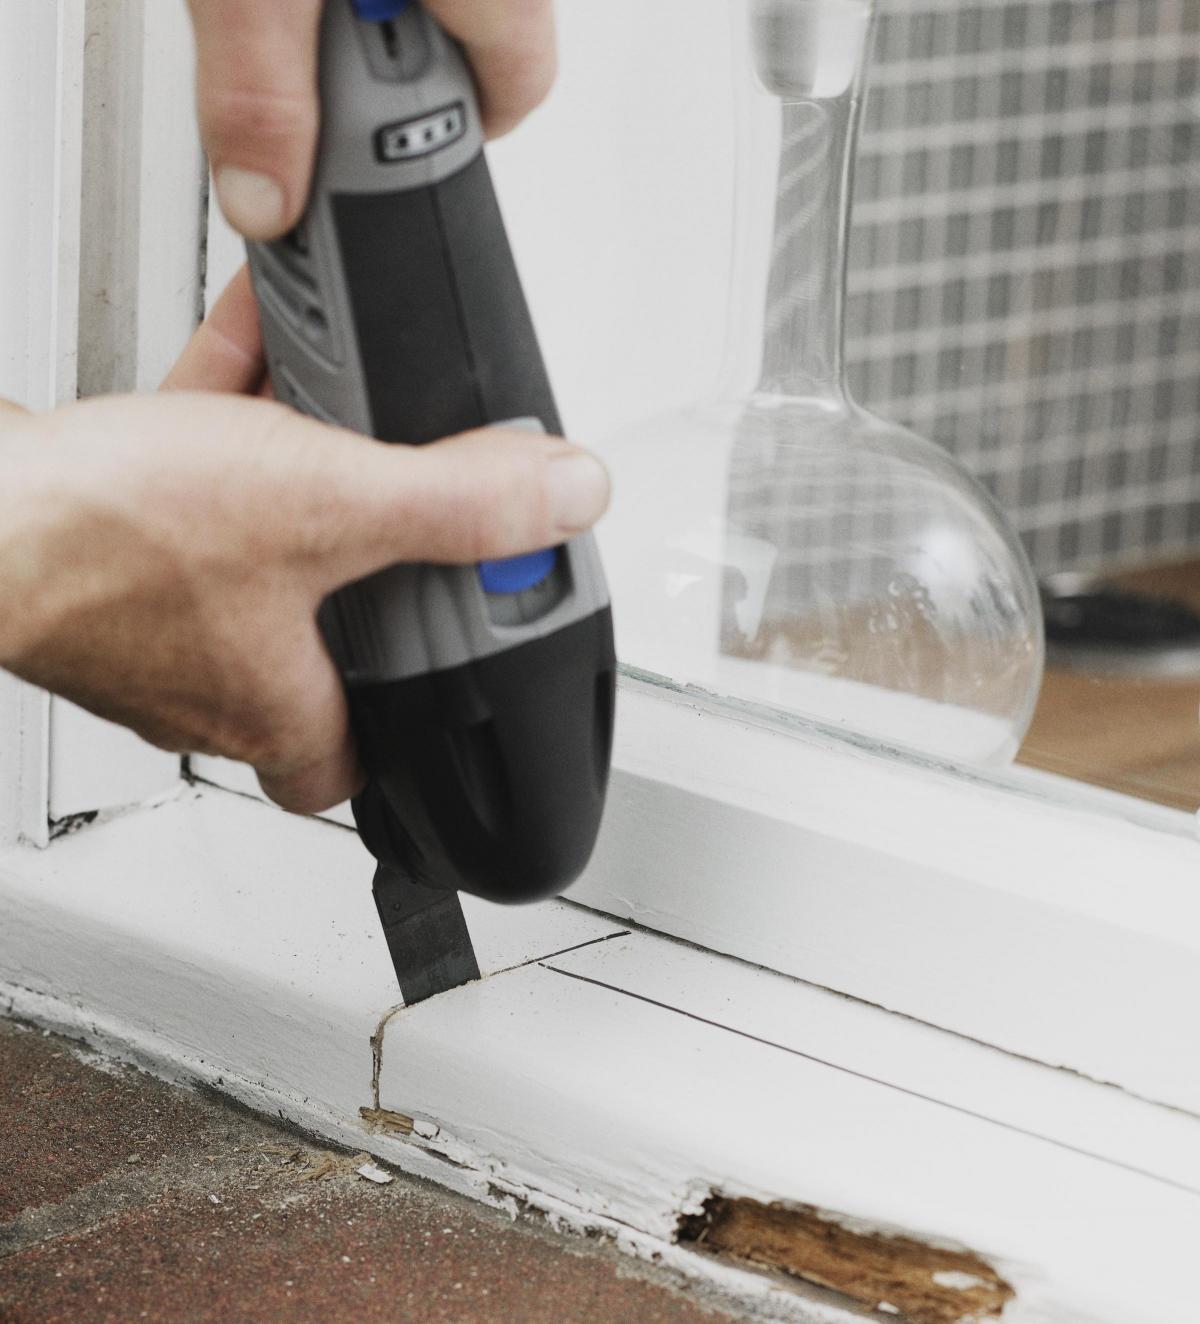
Make a vertical cut to the sides and back of the rotten area using the Dremel Multi-Max set to speed 10 and fitted with the Wood and Metal Flush Cut Blade MM422.
Step Three
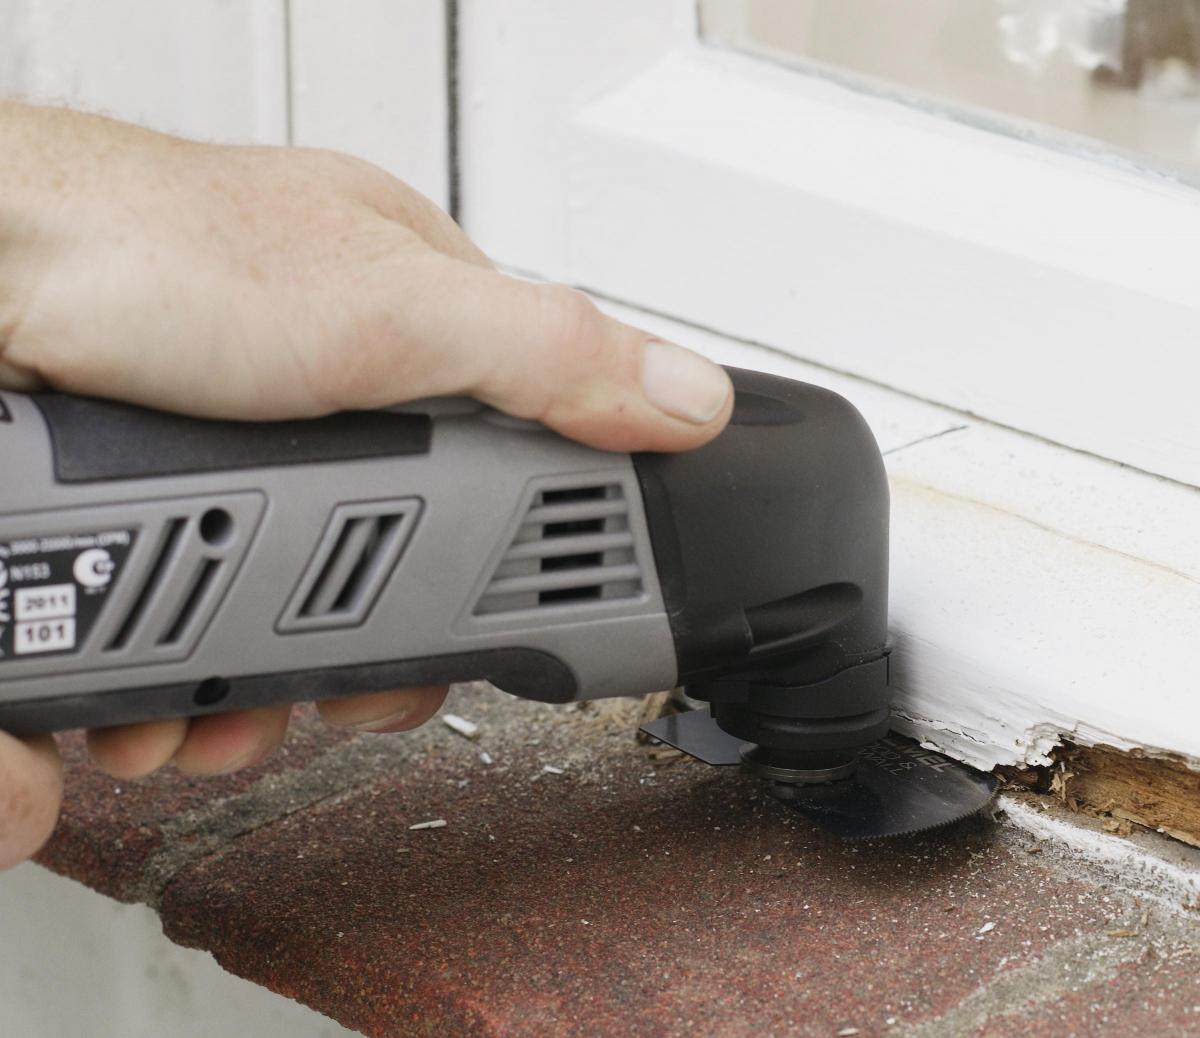
Run along the front of the rotten area with the Dremel Multi-Max fitted with the Wood and Drywall Saw Blade MM450 to make a lateral cut and remove rotten section. If the piece of wood is too deep to cut out the rotten area in one go, then cut it out in sections.
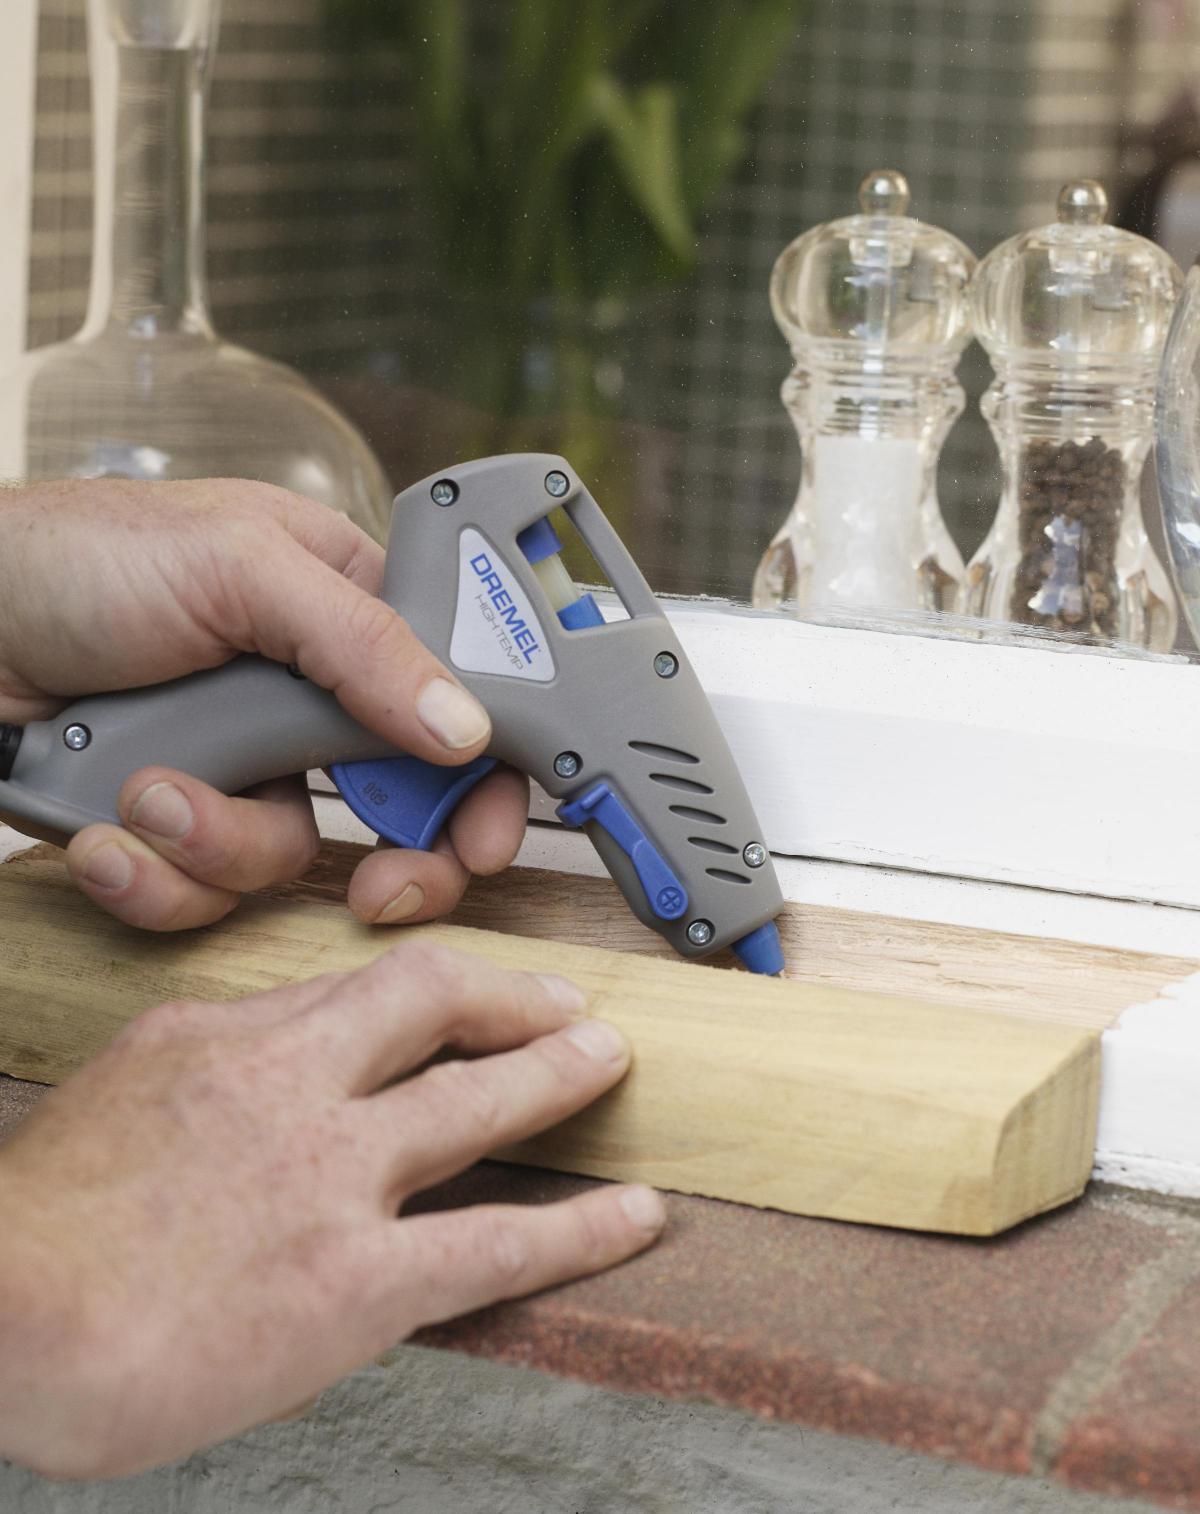
Step Four
Mark up your new piece of hardwood with the right dimensions to replace the rotten area, then, cut out using the Dremel Multi-Max fitted with the Wood and Drywall Saw Blade MM450 set at speed 10. Now you are ready to glue the new piece of hardwood in place using your Dremel Glue Gun 910 and 7mm wood glue.
Step Five
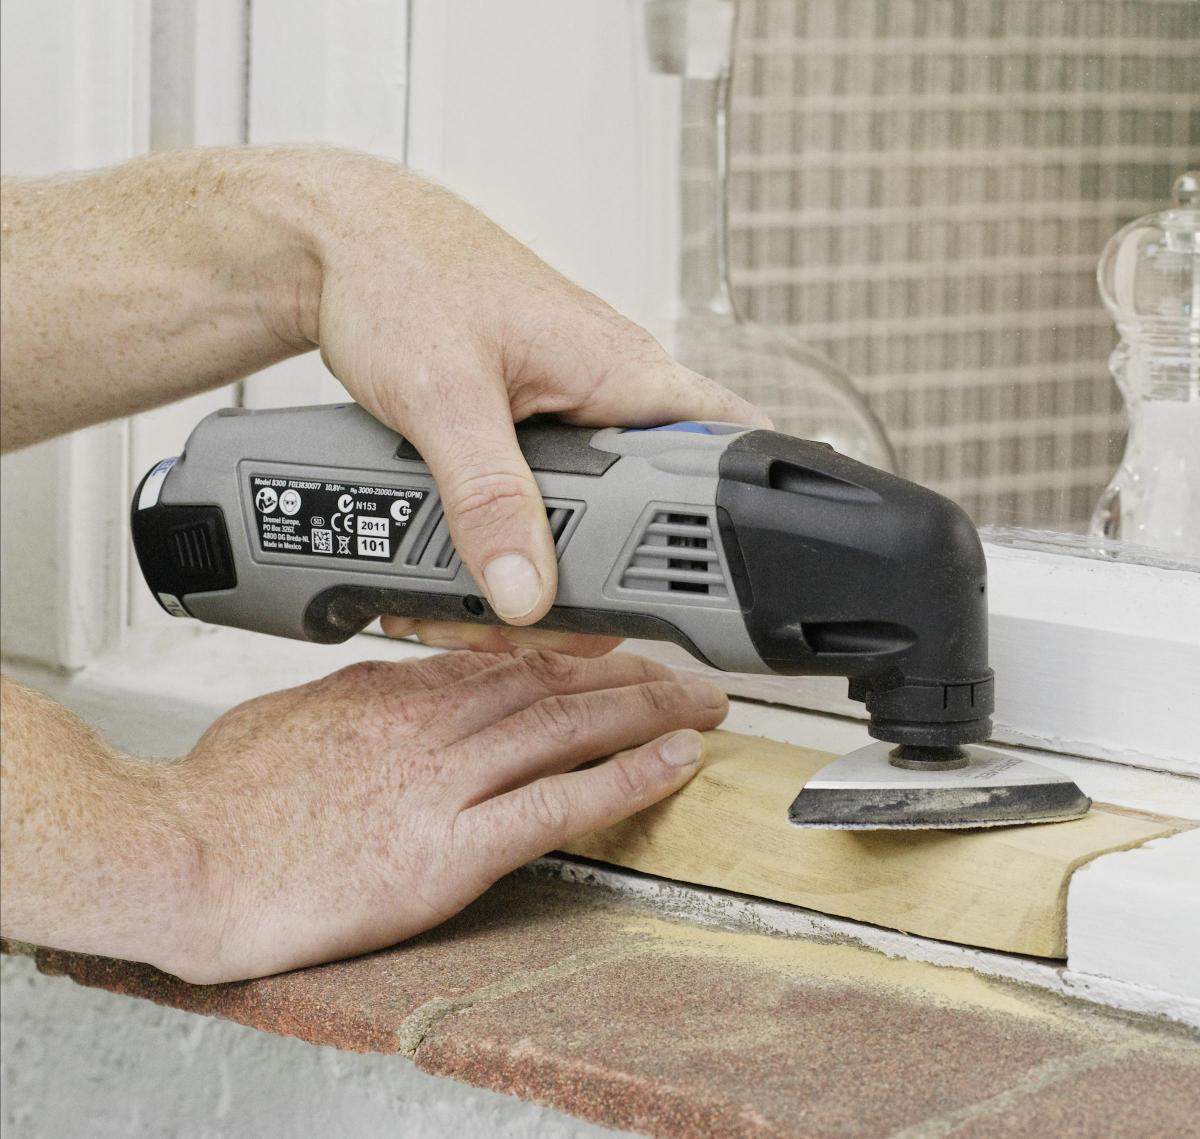
Finally, face fill any gaps or blemishes with wood filler and sand using the Dremel Multi-Max Hook and Loop Sanding Pad MM11 and the Sanding Paper for Wood MM70W which comes in three grits P60, P120 and P240. Then prime, undercoat and paint to finish.


Comments: Our rules
We want our comments to be a lively and valuable part of our community - a place where readers can debate and engage with the most important local issues. The ability to comment on our stories is a privilege, not a right, however, and that privilege may be withdrawn if it is abused or misused.
Please report any comments that break our rules.
Read the rules here